Saturday, April 30, 2016

Altered Seahorse with Flying Unicorn and Prima/Frank Garcia


MAY Your Passion Your Art - May Kit from the Flying Unicorns
It's finally here...the May kit from the Flying Unicorns.  

***********If you missed out on the kit ( it does sell out monthly and quite quickly too!) - then consider our  "never fail" option of pre-ordering on the 20th of every month.  ***************

The wonderful amazing jammed packed kit.  Filled with Prima products, Prima's French Riviera Collection by Frank Garcia, and a heaping big box of embellishments. I love when my favorite kit is filled with wonderful papers from Frank Garcia. 

This month featured the coolest Off the Page piece I've seen is a while.  It's a large  paper mache Seahorse from Bare Naked Crafts.  

Below is the transformation from unfinished to framed.  Once I was done with it, I decided it needed more of a showcase type base,  so I bought a frame and took the glass out.  


I took the glass out of the frame and instead lined the photo mat with Prima paper from the French Riviera collection by Frank Garcia.  The paper is from the kit as well.  

I used the leftover paper pieces from the sheet and cut tiny sections of paper to use in the spine of the seahorse.  I glued each piece down with Prima's soft matte gel medium.  This gel medium is perfect for the paper mache project.  

WARNING:  It's really important to read the instructions that come with this paper mache piece.  

The instructions say not to saturate with a lot of moisture....that means limited misting, water colors, paints and spritzing.  This particular style of paper mache will indeed warp and rip with a lot of moisture.  

I stuck with products with low moisture - Tim Holtz Distress Ink and Prima's Soft Matte Gel Medium.

My finishing touches on the piece were  Prima Memory Hardware Pearls by Frank Garcia as well as Prima's Glass Beads and MicroBeads.   The larger gold and burgundy pearl beads are the Memory Hardware pearls.  I love them.

I adhered them also by using "gobs" of Prima's Soft Matte Gel Medium as glue.
OK gonna get technical here for a moment..... Do this by globbing dabs of gel medium into the seahorse using my finger ( or a paint brush if you prefer) - then dropping the pearl , glass beads or microballs into place.    Let air dry.  Works like a champ BUT you need to "gob" the gel on.  No worries because it does dry clear.


This is what it looked like before being set onto the frame. 

Time is precious.  I value the time you spent here.  Thanks so much for stopping.  I value your feedback. 

If you missed out on the kit ( it does sell out monthly and quite quickly too!) - then consider our  "never fail" option of pre-ordering on the 20th of every month.  


Products Used:
Flying Unicorns May Kit for the Month - Your Passion Your Art
Bare Naked Crafts - Paper Mache Seahorse
990787 P rima12x12 French Riviera-Journees De Rives et Aventures 990787
990381 Prima Memory Hardware - Pearls 
961428 Prima Soft Matte Gel Medium
962579 Prima Micro Beads - Copper 
963934 Art Ingredients Glass Bead Set 963934
584269 Prima Confection Watercolor Pan - Tropicals
Tim Holtz Distress Inks - Vintage Photo


May Flying Unicorns Reveal - Your Passion Your Art


http://www.flyingunicornstore.com/category_s/1587.htm


The Flying Unicorn monthly, Your Passion Your Art kit is now bigger than ever - overflowing with all the goodies you desire with all our previous kits rolled into one GRAND collection...

ONE month, ONE kit.


The Flying Unicorn now includes papers, an "Off the Page" project, a mixed media collection, and all the coordinated embellishments in one kit, and at one crazy magical Price of 59.99!!


From layouts, cards, tags, mixed art and so much more...
Kit Includes : Prima French Riviera Papers : Juste Toi, Respirer l’air de La mar, AuBord la Mer, Journees De Reves et Aventures, Un Petitt Mot De la Mer, Cote d’Azur , Authentique Papers Explore Four, Explore Six, ExploTwinere Twelve, Explore Two. Embellishments: Explore Detail Sticker Sheet, Darling Boy Alpha Stickers, Prima Flowers-586188,prima Stencil584610, ^ journal cards from the French Riviera Collection, 6x6 chipboard, Prima Flowers 586249, Prima Stamp-990947, 1 6x6 Resist sheet from the French Riviera Collection, 6x6 Paper Pack French Riviera, Brads-583866, Prima Flowers 586201,13 Arts Grained Grit, 13 @rts mist, Color Bloom Cobalt Blue, Burlap 12” Flying Unicorn Adornments, Chipboard Pieces, Unprocessed twine,* OFF THE PAGE.PAPER MACHE SEAHORSE.


Get excited and enjoy what the creative team has done with the Flying Unicorn May 2016 Your Passion. Your Art Kit.


Layouts
“Close your eyes and turn your face into the wind.

Feel it sweep along your skin in an invisible ocean of exultation.

Suddenly, you know you are alive.”


Cards
“In a daily life, reach out to others with sacred act of saying ‘hello, a smile, word of encouragement….”


Tags
“Imagination is everything. It is the preview of life's coming attractions.”


Off the Page
“My soul is full of longing
for the secret of the sea,
and the heart of the great ocean
sends a thrilling pulse through me.”


Mixed Art
“If you ask me what I came to do in this world, I, an artist, will answer you: I am here to live out loud.”
Émile Zola


Are you visiting the Tallahassee area soon?
Stop in and say hello!
Plan a day trip! Crops -Classes-Fun
926 North Monroe St
Tallahassee, Florida
Tel: 850.270.6366 Toll Free 800.231.7119


Friday, April 29, 2016

Shaker Card DIY Tutorial - Prima Julie Nutting Doll Stamps

Shaker Card Simple DIY Instructions
I created a few quick and easy shaker cards for Make-N-Takes and group projects featuring the Prima doll stamps created by Julie Nutting.  As a result, a few folks asked me to compile some easy DIY instructions so they could use the technique for group projects as well.  

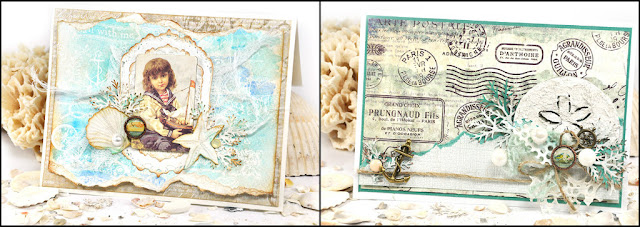
I made two cards - a boy and a girl card.  They have different sentiments and the boy has a mat background - but otherwise the techniques are the same.  

If you scroll down, I share my DIY instructions as well as some pit falls and "fails" that I have overcome after some dismal shaker card attempts.   I offer tips for shaker success.  

This little darling is Keira all gussied in purple and pink.     

Here is the sweet boy, Toby.  


These are my instructions: 

 My card is about 6.25" x 5" big.  I do buy pre-folded card/envelope sets  because I love the convenience.  I also love having envelopes that fit.  I hate trying to hunt down envelopes for irregular sized cards.  

Step 1.   I knew I wanted to use watercolor pencils for my card so I used watercolor paper for the window and doll stamp.  I cut a piece of watercolor paper to fit my needs.  I do think watercolor paper works best when using watercolors.  The paper doesn't rip and tear when it gets wet as patterned paper or cardstock may do. 

My shaker card "fail" and my tip for success: 
I punched first then I stamped the doll image.  The punch was first because then I could determine exactly where to add the stamp.  I tried stamping first and the poor sweetheart lost an arm.   

Step 2.   Every shaker card needs a "sandwich layer".   I found that Fun Foam makes for great sandwich material.  It's super easy to cut, light weight, has a consistent flat surface and is very inexpensive.   

My shaker card "fail" and my tip for success: 
So why didn't I use cardboard?  Well I tried a shaker card using cardboard.  Ya know those cool little tunnels in the corrugation of the cardboard?  Well, they become less cool when the beads and shaking material fall out of the tunnels of the cardboard onto your floor.  An empty shaker card looks ridiculous. 

So why didn't I use foam tape? Many reasons actually.  

  • Foam tape is much more expensive than a sheet of Fun Foam.  
  • With my window being more circular, it's so much harder to create a good seal with foam tape so that shaker material doesn't fall out.  
  • I need to use a lot of foam tape to cover the surface of the card and provide support.  If I do not have a flat surface for the top layer, I may get dips and ripples in my top layer.  Man I hate dips and ripples in my cards.  Hate that!  Plus I am too cheap to waste all that foam tape.  


Step 3.  I used the punched window as a template for tracing onto the foam.

My shaker card "fail" and my tip for success: 
Do not add the window to the card until you create your foam template and know where to cut the foam.  Yeah - I've messed up a few times and glued my window to the card before tracing.  Let's just say I am not good at guessing where to cut the perfect hole.  haaaaa!  Good thing Fun Foam is cheap.  

Another tip....if you are making a bunch of these, it's usually best to custom cut the foam for each card.  Unless your punching is spot on perfect for every card, you are going to run into foam problems.  Once again...I appreciate the fact that Fun Foam is cheap after 5 cards for Make -N-Takes didn't fit properly.  


Step 4. Cut the foam bigger than the traced lines.  Now is not the time to bother with perfection.  No one will see the foam underneath.  
Step 5.  Glue the foam to the base layer of the card.  Make sure you have added a sufficient amount of glue around the circle of the foam.  You need to create a good seal so you do not lose your shaker material.  

I like using a strong durable glue that works well with many surfaces. I am using Beacons 3-in-1 glue.    This also dries crystal clear.  It really is remarkable. 

My shaker card "fail" and my tip for success:   Do not try outsmarting the Fun Foam by pulling out your glue gun and using it to adhere the foam to the card.  The foam will have the last laugh and you'll be thankful Fun Foam is cheap.  haaaaaa.  

The foam does melt and warp when using the heat gun or hot glue gun.  I've done it.  And yes.....I was thankful  Fun Foam was cheap.  


Step 6.  Now you can add anything you want inside the window.  I added glass beads.  You can add sequins, trinkets, crystals, and anything that moves freely.  

My shaker card "fail" and my tip for success: 
Is glitter ok to use?  You can certainly add glitter but it does have a tendency to stick to the acrylic window from static.  When I used glitter for the first time, all I saw was the glitter.  It stuck to the acrylic like a glitter blizzard.  I just could not get it to shake off.  

You can wipe the acrylic with an Embossing Buddy (a little pillow filled with a cornflour like substance to remove static from cardstock).  You can also wash the acrylic with soap and water which will help.  

I'm too lazy to do either of those so I pick shaker material that I know will shake.  


Step 7. Now's the time to find some acrylic for the window.  I love to save acrylic from packaging.  Sometimes embellishments come with an acrylic package.  I save everything with acrylic; produce comes in acrylic ( lettuce, strawberries, tomatoes...whatever), baked good come in acrylic (YUM), below was a CD set that came in wonderful fabulous reusable acrylic.   I save it all!

Step 8.  Once again, I pulled out my strong glue because I know it will hold my acrylic in place.   Add glue all the way around the window to create your seal.   


Step 9 Attach your window to the card.  Add glue around the window to create a secure seal. 

Warning Warning Warning...add your shaker material before you close up the window.  While that should be absolutely obvious, this remains the single hardest step for me to remember.   I cannot tell you how many times I have closed up an empty shaker card.  sheesh.  I tend to get so excited that I am just about finished that I plumb forget to add the beads.  I'm just telling it like it is. 

Step 10  Decorate your card as you wish.  
Step 11 I used Prima's watercolor pencils and waterbrush to add pops of color to my doll stamp.  I also added Prima flowers and a pretty gingham ribbon.  

And here are a few more photos of the  successful shaker cards.  


Thanks for stopping.  I treasure your support and comments.


Products
910808 Prima Julie Nutting Doll Stamp - Keira
910969 Prima Julie Nutting Doll Stamp - Toby
846961  Prima Epiphany 6x6 paper pad
585891  Prima Watrerbrush Pen set
576714 Prima Mixed Media Watercolor Pencils - The Basics
712396 Prima Wildflowers Pillar Pack Botanical Flower Mix
571726 Prima Lucido Spring Flower Mix
Fun Foam
Beacons 3in1 glue
Pre-folded Cards
Gingham trim
Glass Beads
stamps
Ink

Thursday, April 28, 2016

Lemoncraft Card - Neverending Summer


Lemoncraft Week - Card Number 2
It's Lemoncraft week and  I'm showcasing Lemoncraft products all week on my blog. 
 I'm here today to share another card I made for April's Lemoncraft blog.  You can see the original blog post right here.  You can also find so many more gorgeous Lemoncraft products on the Lemoncraft blog here.  

This card was made using the 12x12 Basic paper pad from the 'House of Roses' collection. The Basic paper pads are versatile and packed with easy to use patterns. 
The sheet I used had soft script on it.    I gussied it up by using an embossing folder with dots.  I dabbed ink pads on it  ( Distress ink in Picked raspberry and Walnut Stain) and misted with water to activate the Distress inks.  Then I ran through my Spellbinders Platinum die cutting/embossing machine. 

OK hold it..what did I do?  

Step 1.  I grabbed an embossing folder with dots on it.  This was from Darice - called Dots. 

Step 2.  I blotted the Distress inks onto the dots on the folder.  I blotted the Picked Raspberry and the Walnut Stain Distress ink.

Step 3  I misted the folder lightly with water.  very lightly.  

Step 4  Ran through the die cut machine.  

See how pretty the distressed dots are on the card?  

I embellished with a label from Lemoncraft's Vintage Labels 2 .  I added the butterfly, that was also cut from the same Vintage Label sheet.   

The paper flowers are from Prima's Tales of You & Me collection.  
Thank you for stopping by! 
Jennifer Snyder


Products and Links:
House of Roses 12x12 Stack of Basic Scrapbooking papers
Neverending Summer collection - Ribbons and Lace Set
House of Roses Labels 2 sheet
Vintage Labels 2
Darince Embossing Essentials  Dot 1217-67
Prima Tales of You & Me Collection - Flowers 586348
Tim Holtz Disgtress Ink - Walnut Stain, Vintage Photo and Picked Raspberry